Proxmox VE ( Arm64 ) 更名 Pxvirt ( Arm64 ) 官方文档:PXVIRT GITHUB
安装 Armbian,Amlogic Rockchip 和 Allwinner 的安装方法不同,请阅读相关章节
文档链接:https://github.com/ophub/amlogic-s9xxx-armbian/blob/main/documents/README.cn.md
固件地址:https://github.com/ophub/amlogic-s9xxx-armbian/releases
官方固件:https://www.armbian.com https://github.com/armbian
版本选择:bookworm
输入命令:ophub 仓库固件 armbian-software 选择 308 可一键自动安装(网络已科学)
# 适用于 Ophub/官方固件的安装脚本,测试机型 N1、NanoPC-T4(安装过程选项参考步骤 14)
curl -fsSL https://raw.githubusercontent.com/Zane-E/Armbian-Actions/main/scripts/install-pve.sh | sudo bash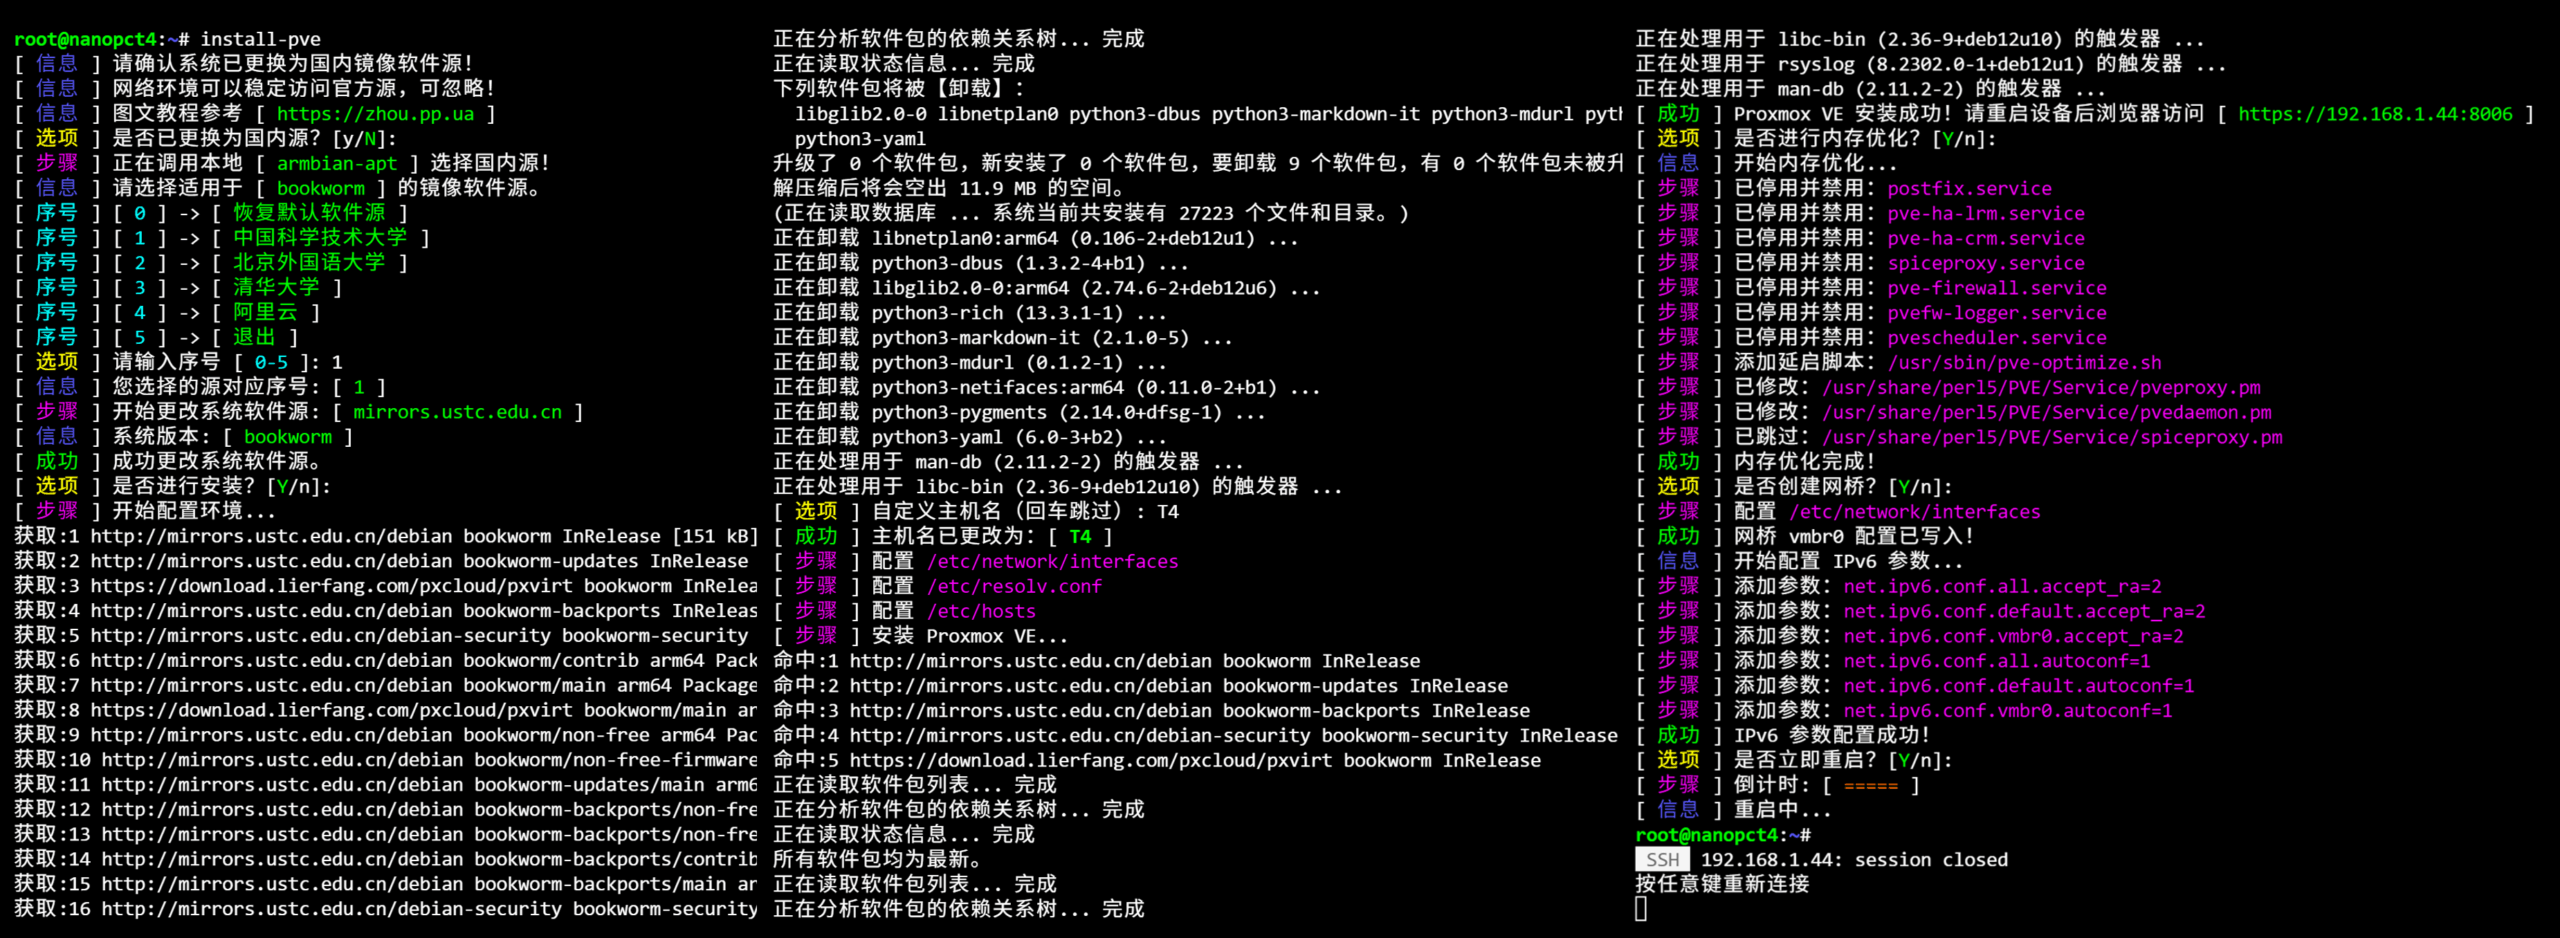
手搓教程:
1、禁用 zram ramlog # 非必须
systemctl disable armbian-zram-config.service
systemctl disable armbian-ramlog.service
2、备份、新建 debian 源——清华或中科大源(二选一)# 非必须
mv /etc/apt/sources.list /etc/apt/sources.list.bak
mv /etc/apt/sources.list.d/debian.sources /etc/apt/sources.list.d/debian.sources.bak
nano /etc/apt/sources.listdeb http://mirrors.tuna.tsinghua.edu.cn/debian bookworm main contrib non-free non-free-firmware
deb http://mirrors.tuna.tsinghua.edu.cn/debian bookworm-updates main contrib non-free non-free-firmware
deb http://mirrors.tuna.tsinghua.edu.cn/debian bookworm-backports main contrib non-free non-free-firmware
deb http://mirrors.tuna.tsinghua.edu.cn/debian-security bookworm-security main contrib non-free non-free-firmwaredeb http://mirrors.ustc.edu.cn/debian bookworm main contrib non-free non-free-firmware
deb http://mirrors.ustc.edu.cn/debian bookworm-updates main contrib non-free non-free-firmware
deb http://mirrors.ustc.edu.cn/debian bookworm-backports main contrib non-free non-free-firmware
deb http://mirrors.ustc.edu.cn/debian-security bookworm-security main contrib non-free non-free-firmware3、备份、新建 armbian 源——清华或中科大源(二选一) # 非必须
mv /etc/apt/sources.list.d/armbian.list /etc/apt/sources.list.d/armbian.list.bak
mv /etc/apt/sources.list.d/armbian.sources /etc/apt/sources.list.d/armbian.sources.bak
nano /etc/apt/sources.list.d/armbian.listdeb [signed-by=/usr/share/keyrings/armbian.gpg] https://mirrors.tuna.tsinghua.edu.cn/armbian bookworm main bookworm-utils bookworm-desktopdeb [signed-by=/usr/share/keyrings/armbian.gpg] https://mirrors.ustc.edu.cn/armbian bookworm main bookworm-utils bookworm-desktop4、备份、禁用 armbian-config 源 # 非必须
mv /etc/apt/sources.list.d/armbian-config.sources /etc/apt/sources.list.d/armbian-config.sources.bak5、使用正确的 path
export PATH=/usr/local/sbin:/usr/local/bin:/usr/sbin:/usr/bin:/sbin:/bin6、添加密钥
curl -L https://mirrors.lierfang.com/pxcloud/lierfang.gpg -o /etc/apt/trusted.gpg.d/lierfang.gpg7、添加源
echo "deb https://mirrors.lierfang.com/pxcloud/pxvirt bookworm main" > /etc/apt/sources.list.d/pxvirt-sources.listps:
其他镜像源:Pxvirt Mirrors
8、安装 ifupdown2 resolvconf,移除 netplan,禁用 NetworkManager
apt update && apt install -y ifupdown2 resolvconf
systemctl enable networking
systemctl disable systemd-networkd
systemctl disable systemd-networkd.socket
apt remove -y netplan.io && apt autoremove -y
systemctl stop NetworkManager
systemctl disable NetworkManager9、修改网络配置,按需修改,mac 地址(fc:7c:02:28:99:0e)及网口名(eth0)用 ip a 查看后替换
nano /etc/network/interfaces 例: auto lo iface lo inet loopback auto eth0 iface eth0 inet static hwaddress ether fc:7c:02:28:99:0e address 192.168.1.228/24 gateway 192.168.1.1
10、修改 dns,按需修改或填写公共 dns(223.5.5.5 等)
nano /etc/resolv.conf 例: search lan nameserver 192.168.1.1
11、修改 hostsname,按需修改
nano /etc/hostname例: N1
12、修改 hosts 文件,对应 hostname、ip,按需修改
nano /etc/hosts例:
127.0.0.1 localhost
192.168.1.228 N1.local N1
::1 localhost ip6-localhost ip6-loopback
fe00::0 ip6-localnet
ff00::0 ip6-mcastprefix
ff02::1 ip6-allnodes
ff02::2 ip6-allrouters
13、重启下设备
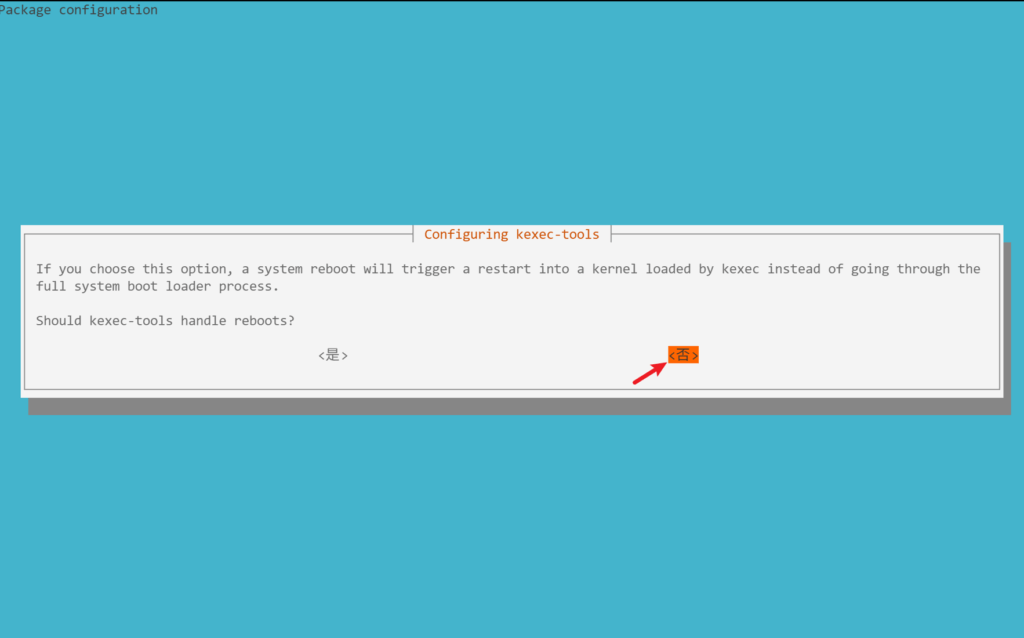
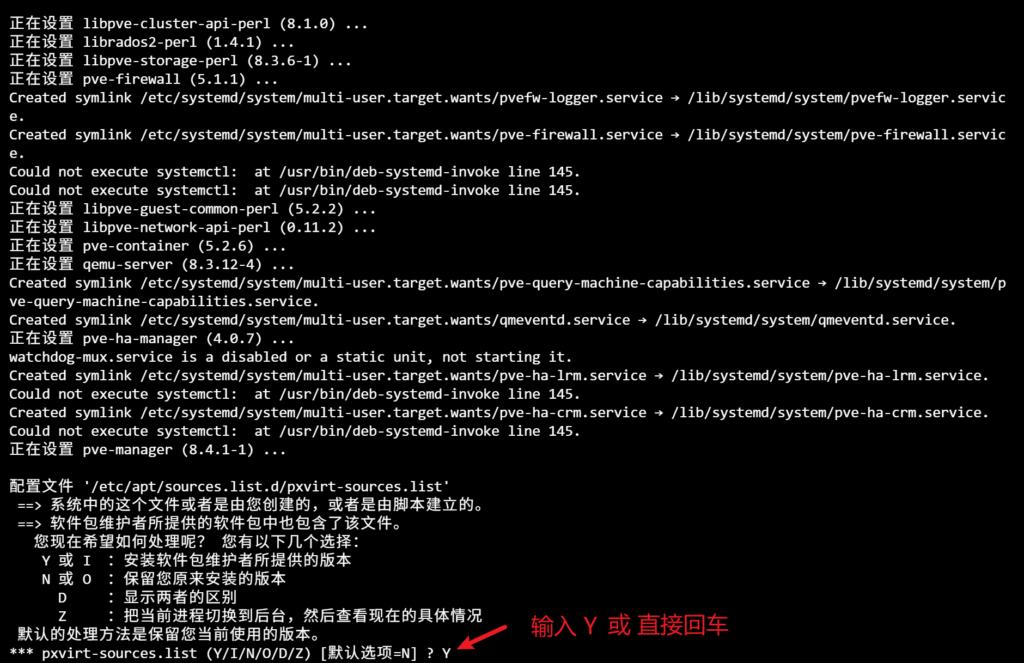
reboot14、安装 Pxvirt ,过程中选项参考下图
apt update && apt install pxvirt -y
# apt update && apt install proxmox-ve -y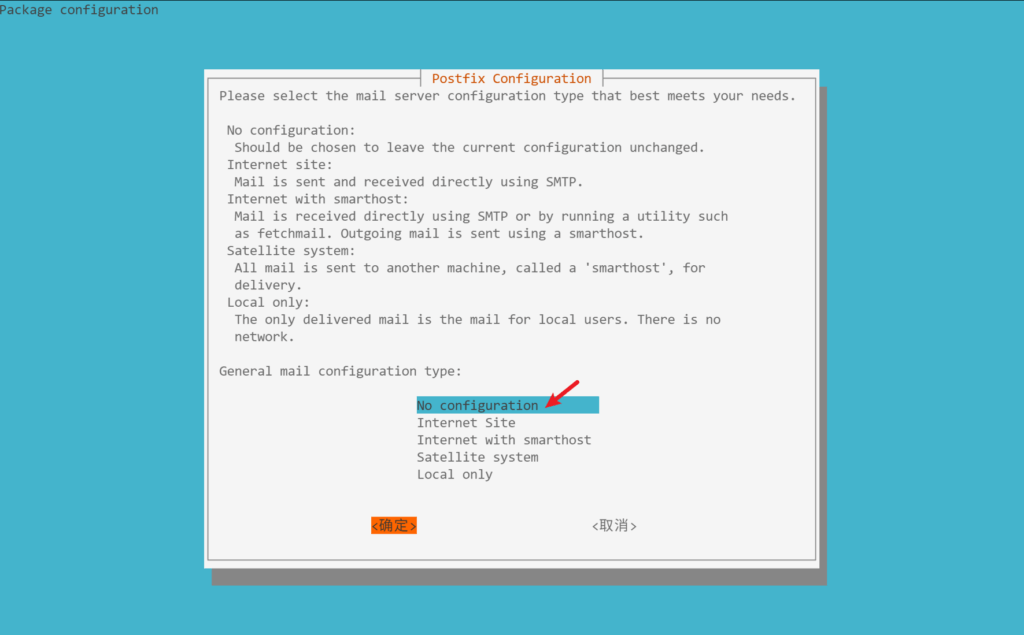
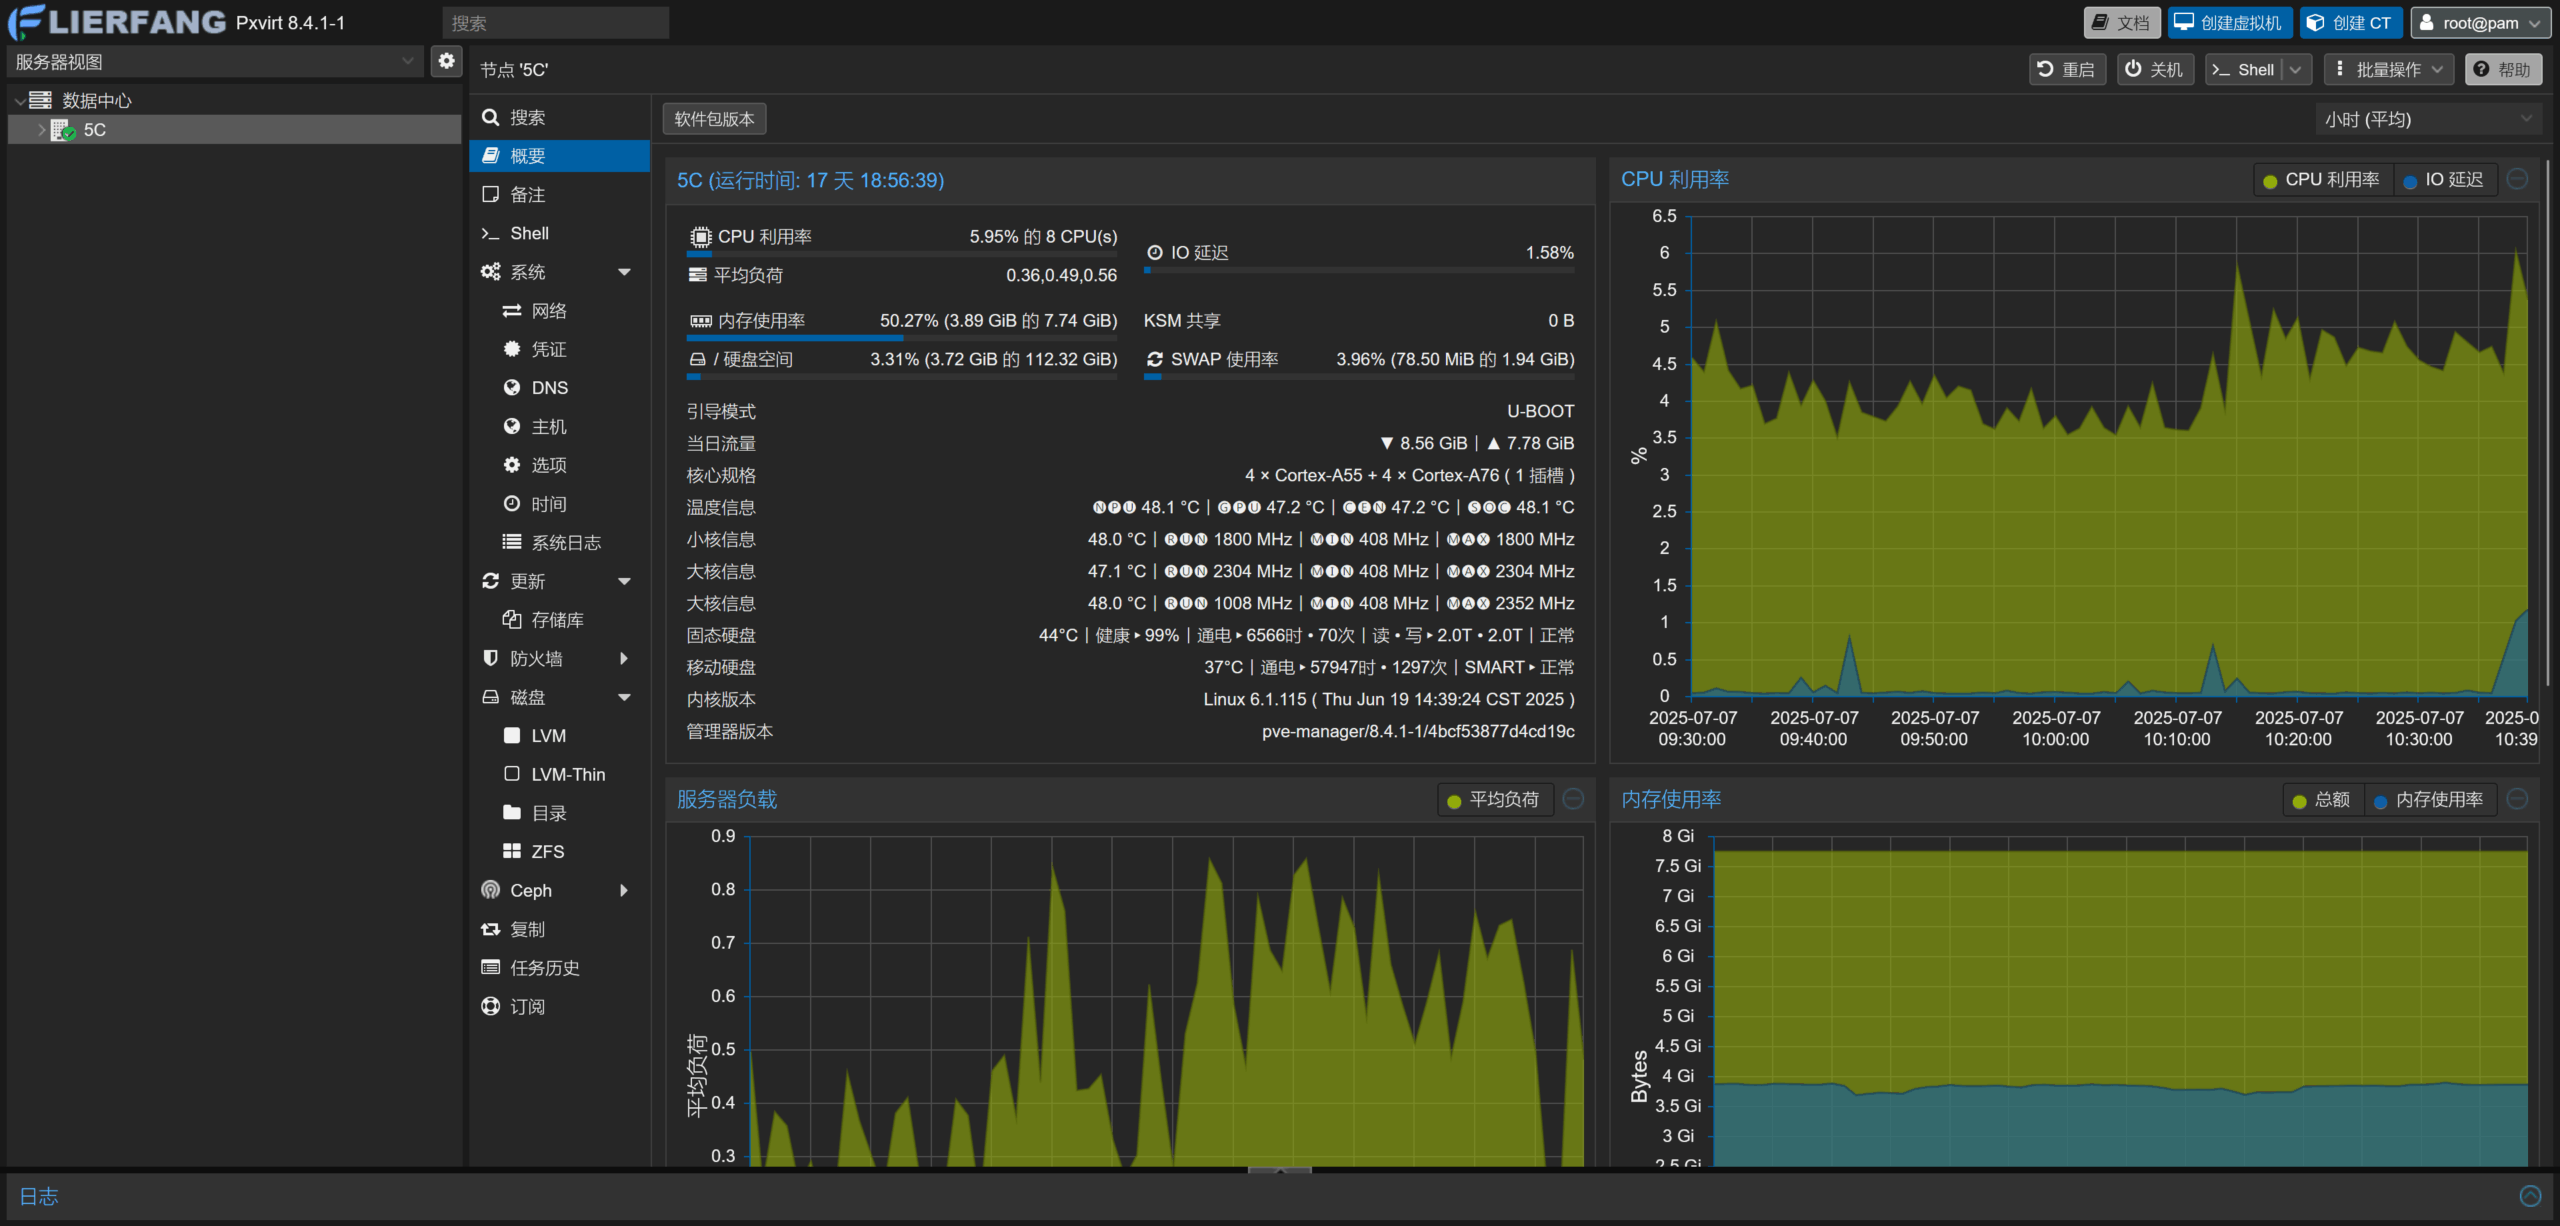
等待安装结束后,浏览器输入 https://ip:8006 进入 proxmox-ve 管理界面
若安装最后出现下面错误,见修复方法
Errors were encountered while processing:
pve-manager
proxmox-ve
E: Sub-process /usr/bin/dpkg returned an error code (1)
查看 pveproxy 状态
systemctl status pveproxy报错部分
/etc/pve/local/pve-ssl.pem: failed to use local certificate chain (cert_file or cert) at ·······
修复方法
rm -f /etc/pve/pve-root-ca.pem /etc/pve/priv/pve-root-ca.* /etc/pve/local/pve-ssl.*pvecm updatecerts -fsystemctl restart pveproxy浏览器输入 https://ip:8006 进入管理界面